For this photograph, which was taken in the style of Doug Rosenoff, I tried to produce an image using a comparable composition to his work. I found two similar shaped flowers white are positioned in a central foreground. The coloured version has indigo coloured petals. When I converted my image into black and white using Photoshop, I noticed that the saturation of the images colours had changed and the darkness tone of the background was similary brightening the main focus of the foreground petals, just like in Doug Rosneoff's image. The mid-ground is a blurred grey shade, with hints of light that can be seen reflecting from the surrounding environment which creates toned shadows shown in the photograph.


For this photograph, which was taken in the style of Doug Rosenoff, I tried to produce an image using a comparable composition to his work. I found two small similar shaped flowers which are positioned in a central foreground. The colored version of my experiment is of various shades of white and pink petals. I like how the black and white converted version hints at these tones proving that without viewing the original you can tell that the shaded sections of the petals are darker. The background is blurred automatically making the flower's petal/head the focal point.


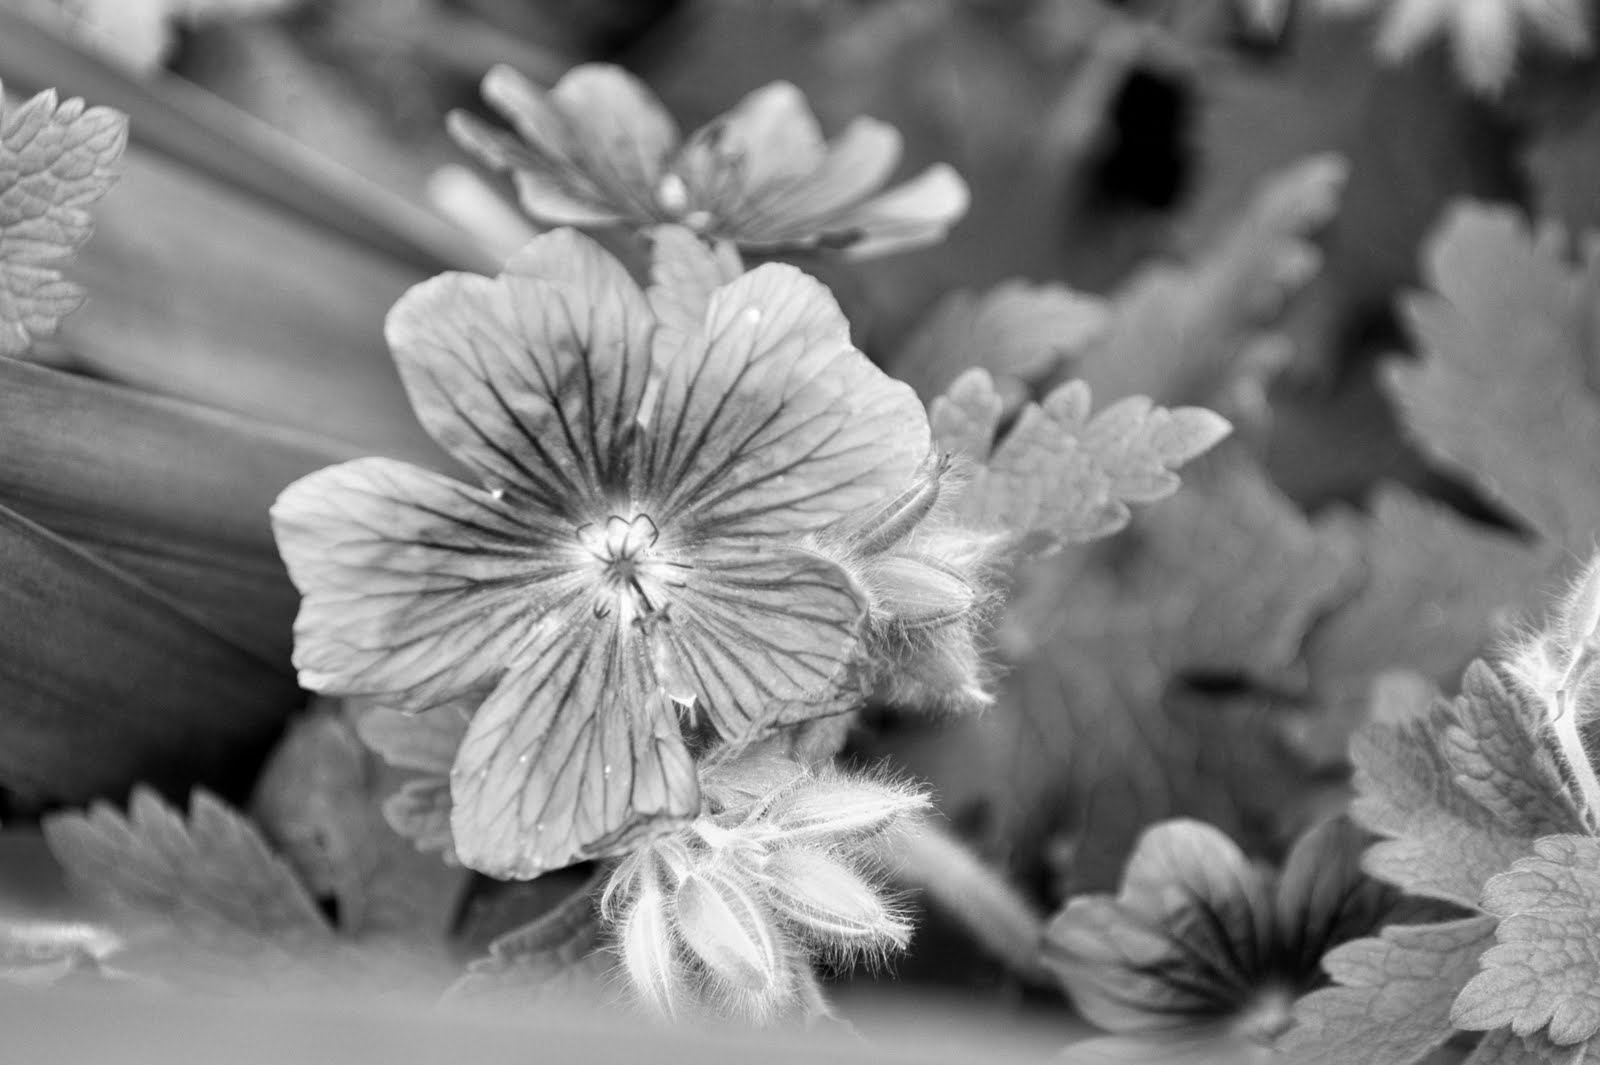
For this photo, I found a delicate shaped flower, of which the petals are originally a pinky/purple colour. This flower has been framed in a central position of the fore-ground. The background has been blurred, automatically making the flower the main focus. I converted the original photograph, using Photo-shop into black & white. I also edited the brightness and contrast levels. This gave the image brighter in areas where the natural light has been captured. E.g Petals, background wall, hints of the stem. As it is a photograph of just a single flower I feel that it makes the image look for eye-catching than a group of flowers would.

For this experiment I used a macro lense to capture a close-up/detailed shot of the daisy's. I converted the image into black and white using the editing software Photoshop. I also changed the brightness and contrast levels to add dark shadows and tone. When I took this photo I used the automatic flash on my Nikon D500 Camera to encourage the natural sunlight to show. I chose to frame the photograph in this composition because I liked the simplicity of the look the viewfinder showed. I also like how the grass in the foreground is blurred but helps for me make the daisies in the mid-ground the main focus. The background of the image has been blurred as well, which also automatically helps makes the flowers the focal point. I like how the darkness of the shadow and tones provide, crisp detailing and adds curiosity to the viewer because of the amount of focus.


For this experiment I used a Macro lense on my Nikon D500 camera. This is so I could capture detailing and a closer shot on the flower and it's petals. Once I captured my image in colour on my camera I then edited the image using Photoshop and changed the brightness and contrast levels to add a darker and greater depth to the image. However I feel that the result is a quite light grey and could do with more shadows. I also used my automatic flash on my camera to brighten the image. In addition I added a black and white filter, this provides the greyscale appearance. I like how the main focus is of the flower in the mid-left frame. I didn't want to take the image just of the main subject matter. Instead I included the grass and other leaves because it gives a more nature appearance. You can easily see the detail and shadow because of the brightness levels changed. In addition I tried to capture texture and consider how the tone would develop as a final print.


In this experiment I used a macro lens on my Nikon D500 Camera. I also used the automatic flash, this encouraged any natural light to show as well as brighten and highlight the main feature. The flower in the coloured version is a fuchsia colour. Using Photo-shop I converted the image from colour into black & white. I also changed the brightness and contrast levels to add dark shadows and tone to the overall photograph. I chose to frame the photograph in this composition because I liked the simplicity of the look the viewfinder showed. The flower has been framed in a central position. The background of the image has been blurred, which automatically makes the flower in the foreground the focal point. I like how the dark shadow and tones provide sharp, crisp detail.


This experiment was made using a Nikon D500 Camera. I also used a Macro Lens to capture a closer, more detailed image. I captured the original photograph in colour and converted into black & white using the photo editing software Photo-shop. I also changed the brightness and contrast levels which makes the image darker in the shaded area's and lighter where it's brighter. It also adds a greater depth to the image. You can easily see the detail and shadow because of the brightness levels changed. The image is also a lot whiter as I used the automatic flash. I like how the main focus is of the flower centered in the frame. In addition I tried to capture texture and consider how the tone would develop as a final print.


I chose to capture this experiment using this composition because I liked how the flowers where grouped together in the middle of the frame, (Which is the main focus of the image), but still has a few other of the same flowers around the sides of the frame. The background has been blurred which helps make the flowers/petals the focal point. Once I captured the original colored version with my Nikon D500 Camera, I converted it into black and white using Photo-Shop, changing the brightness and contrast levels to brighten the image, add darker shadows and add attraction and detail. I tried using the techniques of Doug Rosenoff, thinking how the photographer would of pictured the image in his mind. This is because Rosenoff is colourblind. In additon I also tried to capture texture and consider how the tone would develop as a final print.


For this photograph experiment I used a macro lens to capture a close-up and show the detail of the flower. I converted the image into black and white using the editing software Photoshop. I also changed the brightness and contrast levels to add dark shadows and tone. I chose to frame the photograph in this composition because I liked the simplicity of the look in the viewfinder and that it fills the frame, which makes the flower the main focus. The original photo is quite dark and not very detailed and crisp as I wanted, however when I edited the image in Photo-shop the brightness increased. Because the petals of the flower were originally White it merges in with the background which doesn't help with adding attraction to the image. If I was going to experiment with this photograph I would maybe try to add a different coloured background for example coloured paper behind the flower.


For this experimental photograph I instantly liked the composition of the frame. It has been framed with the main focus being of the three flower heads in a row in the centre of the fore-ground. The background contains grass and other flowers in the distance however it has been blurred immediately making the three flower heads the central focus. I converted the photograph in Photo-shop, changing the image from color to black & white. In addition I changed the brightness and contrast levels to add darker tone to the background and shadows in the petals and flower itself. Furthermore the white and lightness in the original color image are brighter. One thing I don't like about this photograph is that only the top flower is sharp where as the other two are quite blured and faded.


This experimental photograph was taken using a Nikon D500 Camera. The original flower's petals are purple. The flower itself is next to a brick wall as you can see in the background however it has been blurred, which makes the flower in the foreground, the main focus of the image. I converted the image into black and white using the editing software Photoshop. I also changed the brightness and contrast levels to add dark shadows and tone. When the image was taken there wasn't much natural sunlight so the original photograph is quite dark. Because I changed the brightness and contrast levels the petals on the converted image are a lot brighter and the image is a lot sharper and more detailed as a result.


The flower in this photograph has been positioned in the centre of the close-up frame. I wanted the viewer to instantly look at the flower rather than the background or anything else in the composition. The flower chosen is coming out towards the camera rather than upwards towards the sun/sky. When taking this photograph it was very light outside and most of the sunlight rays were coming from left hand side. You can tell because of the brightness and shadowing shown. The petals of the flower are very sharp, detailed and have a crisp quality. I used Photoshop to convert the original coloured version of this image into black and white. In addition I changed the brightness and contrast levels to add darker shadowing, tone and also brightness to the lighter areas.


In this photo I chose this composition because I liked the simple, delicate look that is shown in the view finder and frame. The selection of flowers/petals are positioned in the middle of the frame to instantly attract the viewers eye however with this photograph I feel that the flowers in the lower half of the photograph frame takes away some focus from the intended main feature. The background is blurred. I converted the image into black & white using photo-shop. I also changed the brightness and contrast levels which gives darker tones and shadowing. This gives a high contrast lighting appearance.


For this photograph I captured a close-up shot. Grass is seen in the fore-ground and background. The purple flowers are shown in the mid-ground. The background is blurred so is the lower half of the group of flowers. I like how the grass in the fore-ground covers the frame however it becomes the focal point of the image instead of the intended floral. Using Photo-shop I converted the coloured image into black & white. I also changed the brightness and contrast levels to add dark shadows and tone. I chose to frame the photograph in this composition because I liked the simplicity of the look the viewfinder showed. The quality of the image is quite sharp apart from the background and certain flower/petals. You can see crisp detail in the top flowers petals.


This experiment was made using a Nikon D500 Camera. I also used a Macro Lens to capture a closer, more detailed image. The three small flowers are in a row in the centre/bottom of the frame in the foreground. The background is blurred making the flowers in the foreground the focal point. I captured the original photograph in colour and converted into black & white using the photo editing software Photo-shop. I also changed the brightness and contrast levels which makes the image darker in the shaded area's and lighter where it's brighter. It also adds a greater depth to the image. You can easily see the detail and shadow because of the brightness levels changed. The image is also a lot whiter as I used the automatic flash. I like how the main focus is of the flower centered in the frame. In addition I tried to capture texture and consider how the tone would develop as a final print.


This photograph was made using a Nikon D500 Camera. I also used a Macro Lens to capture a closer, more detailed image. The flower covers the whole frame placed in the centre. The background is blurred making the flower in the foreground the focal point. I captured the original photograph in colour and converted into black & white using the photo editing software Photo-shop. I also changed the brightness and contrast levels which makes the image darker in the shaded area's and lighter where it's brighter. It also adds a greater depth to the image. You can easily see the detail and shadow because of the brightness levels changed. The image is also a lot brighter in area's as I used the automatic flash. I like how the photograph has a very detailed and crisp quality. In addition I tried to capture texture and consider how the tone would develop as a final print.


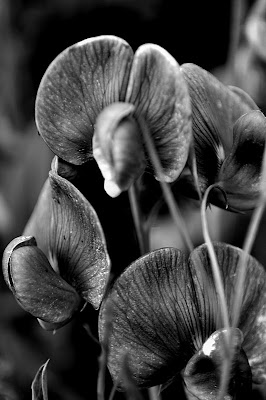
For this photo I used a Macro Lens to capture a closer, more detailed image. The group of purple flowers covers the whole frame. The background of grass is blurred making the flower in the foreground the focal point. I captured the original photograph in colour and converted into black & white using the photo editing software Photo-shop. I also changed the brightness and contrast levels which makes the image darker in the shaded area's and lighter where it's brighter. It also adds a greater depth to the image. You can easily see the detail and shadow because of the brightness levels changed. The image is also a lot brighter in area's as I used the automatic flash. I like how the photograph has a very detailed and crisp quality. In addition I tried to capture texture and consider how the tone would develop as a final print.


In this experiment I used a macro lens on my Nikon D500 Camera. I also used the automatic flash, this encouraged any natural light to show as well as brighten and highlight the main feature. The flower in the coloured version is a fuchsia colour. Using Photo-shop I converted the image from colour into black & white. I also changed the brightness and contrast levels to add dark shadows and tone to the overall photograph. In addition I cropped the photo to get closer to the subject matter focal point. I chose to frame the photograph in this composition because I like how the photograph gives a calm, gentle mood,. The flower has been framed in a central position. The background of the image has been blurred, which automatically makes the flower in the foreground the focal point. I like how the dark shadow and tones provide sharp, crisp detail.


For my photograph, taken in the style of Doug Rosenoff’s photo above, I tried to have a similar composition, the image in addition being taken using a close up shot just like Doug’s.The flower is positioned in the centre of the frame. When I took this image was late afternoon and the sunlight was reflecting onto the near top of the flower’s petals. Using Photoshop I converted it into black & white and then I edited the brightness and contrast of the tone, however the background has developed a lot darker. Despite this you can see detail and shadowing in the petals of the flower. In addition I cropped the picture to get a closer more detailed view of the flower.


To create this photograph I used a Macro lense on my Nikon D500 camera. This is so I could capture detailing and a closer shot on the flowers and their petals. Once I captured my image in colour on my camera I then edited the image using Photoshop and changed the brightness and contrast levels to add a darker and greater depth to the image. I also used my automatic flash on my camera to brighten the image. In addition I added a black and white filter to provide the greyscale appearence. I like how the main focus being the plant, are quite grouped together and are not all the same shape or size. Some are open and have been damaged by the wind and some are wiltering. I didn't want to take the image just of the main subject matter. Instead I included the grass because it gives a purpose to the photo by providing the frame with sections. E.G Top, middle and bottom. You can easily see the detail and shadow because of the help of the greyscale. I tried using the techniques of Doug Rosenoff, thinking how the photographer would of pictured the image in his mind. This is because Rosenoff is colourblind. In additon I also tried to capture texture and consider how the tone would develop as a final print.

For this experiment I used a macro lense to capture a close-up, detailed shot. I converted the image into black and white using the editing software Photoshop. I also changed the brightness and contrast levels to add dark shadows and tone. When I took this photo it was late morning, so I used the automatic flash on my Nikon D500 Camera to encourage the natural sunlight to show. I chose to frame the photograph in this composition because I liked the simplicity of the look the viewfinder showed. The flowers are spread out but still stay grouped together in the photograph. The background of the image has been blurred, which automatically makes the flowers in the foreground the focal point. I like how the darkness of the shadow and tones provide, crisp detailing and adds curiosity to the viewer because of the amount of focus.